By Chris Faubel, MD —
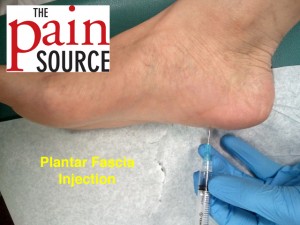
Indications
- Plantar fasciitis / Plantar fascial fibromatosis
- ICD-9 code: 728.71 “plantar fascial fibromatosis”
- ICD-10 code: M72.2 “plantar fascial fibromatosis”
CPT code: 20550 “injection(s); single tendon sheath, or ligament, aponeurosis””
Materials Needed
- Pen – clicking type
- Gloves – non-sterile
- Alcohol swabs (or providone-iodine)
- Band-aid
- 25-gauge 1.5″ needle and 3-ml syringe
- Injectate
- 1-ml of 40mg/ml Depo-Medrol
- 1-ml of 1% lidocaine
- For skin numbing: Tuberculin needle/syringe (27-gauge, 1/2″) filled with 1-ml of 1% lidocaine
Technique / Procedure Steps
- Always start with informed consent from the patient, and then a time-out to verify correct patient and injection site.
- Mark the injection site with the pen tip in order to leave an impression in the skin — point of maximal tenderness.
- Clean the skin thoroughly with as many alcohol swabs as needed (usually 1-2 is needed).
- Patient position: supine with heel hanging off the edge of the table, OR, supine with knee bend and leg externally rotated
- Important: Create the skin wheal and then anesthetize down as far as you can go with the tuberculin needle.
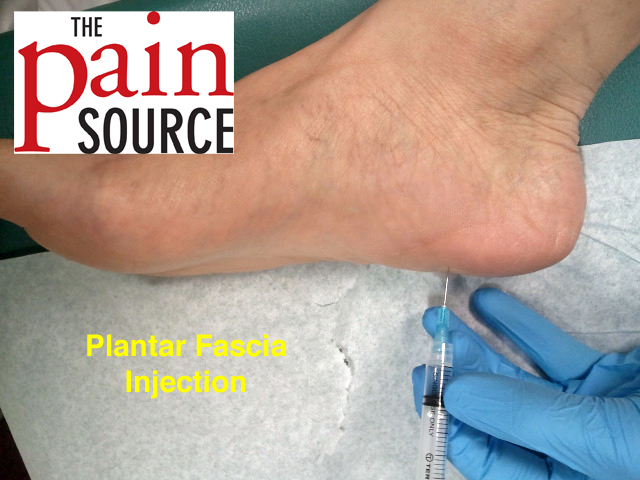
- With the 25G 1.5″ needle, enter the skin going perpendicular to the heel. Gently touch periosteum and then back off 1-2mm.
- Aspirate to make sure you’re not in any vessel.
- After negative aspiration, inject the full contents of the syringe.
- Withdraw the needle and apply band-aid.
Tips
- Finding the injection site
- With the patient in the position that the procedure will be performed, palpate along the distal end of the calcaneous (usually more medial) to find the point of maximal tenderness (POMT).
- Numbing the skin
- Find out all about “Taking the Sting Out” (of injections) by going here.
- This can be an especially painful injection (if no lidocaine skin wheal and ethyl chloride spray is used).
- Procedure for a “pain free” injection
- Fill a 27G 1/2″ tuberculin syringe with 1-ml of 1% lidocaine.
- Use ethyl chloride spray to “numb” the skin over the injection site; then quickly create the skin wheal of lidocaine.
- Insert the tip of the needle just below the surface of the skin, almost at a parallel angle, and inject about 0.5-ml to create the skin wheal. Then go down in the path the 25G needle will take, and anesthetize it with the remaining lidocaine.
- After the injection
- Apply the band-aid, then have the patient stand and walk around so they can see the immediate results of the lidocaine.
- Explain to the patient that the lidocaine will wear off in an hour or so, and that they will be back to their normal pain until the corticosteroids start kicking in (anywhere from 1-7 days).
- May also ask the patient to not do much impact activity on that heel for 12-24 hours.





What are the benefits of injecting through the sole of the foot versus a more medial approach? I’ve seen both injection sites effectively used. Is it based more on the clinicians comfort with a particular approach versus true benefits?
It is all about patient comfort and clinician skills. The plantar approach is definitely more painful, although I have done it on patients that felt no pain at all. The plantar approach would touch the under surface of the calcaneous and therefore much less risk of injecting into the fat pad and getting fat pad necrosis. Since diabetics have a difficult time healing, I would avoid the plantar approach on that population.
How do you know you have not entered into the calcaneal bone? Is it actually possible to get into that bone with a 25g needle? Thanks.
If your needle is in the bone there will be a great resistance when trying to inject the steroid solution. Feel for that solid end feel with the needle tip, then back off a tad.